0. イントロダクション
Apollo を使ったアプリケーションを作成するすためにはまずこのチュートリアルから始めましょう
ようこそ Apollo の世界へ! このチュートリアルではフルスタックアプリケーションの構築を通して、GraphQL の機能を紹介します。用いるのは Appllo 環境のツールです。
Welcome! This tutorial guides you through building a full-stack, GraphQL-powered app with the Apollo platform.
このチュートリアルを通して、Apollo を使うことで実務レベルのアプリケーションの構築が可能であるということを感じてほしいので、あえて "Hello World" レベルのチュートリアルは飛ばして、実際の案件に近しい例を取り上げることにしました。つまり認証があって、ページネーションがあって、テストがって、といった具合のアプリケーションを作っていきます。
We want you to feel empowered to build your own production-ready app with Apollo, so we're skipping "Hello World" in favor of an example that's closer to "Real World", complete with authentication, pagination, testing, and more.
準備はいいですか?ではいきましょう!
Ready? Let's dive in!
What we'll build
このチュートリアルでは、SpaceX 宇宙行き便へ搭乗予約をするためのアプリケーションを作っていきます。まあ Airbnb の宇宙旅行版だと考えてくれればいいでしょう。我々が使うデータは全て本当の SpaceX のものです。SpaceX-API が提供されているおかげです。ありがとう。
In this tutorial, we'll build an interactive app for reserving a seat on an upcoming SpaceX launch. Think of it as an Airbnb for space travel! All of the data is real, thanks to the SpaceX-API.
アプリケーションが完成すると以下のような見た目になります。
Here's what the finished app will look like:
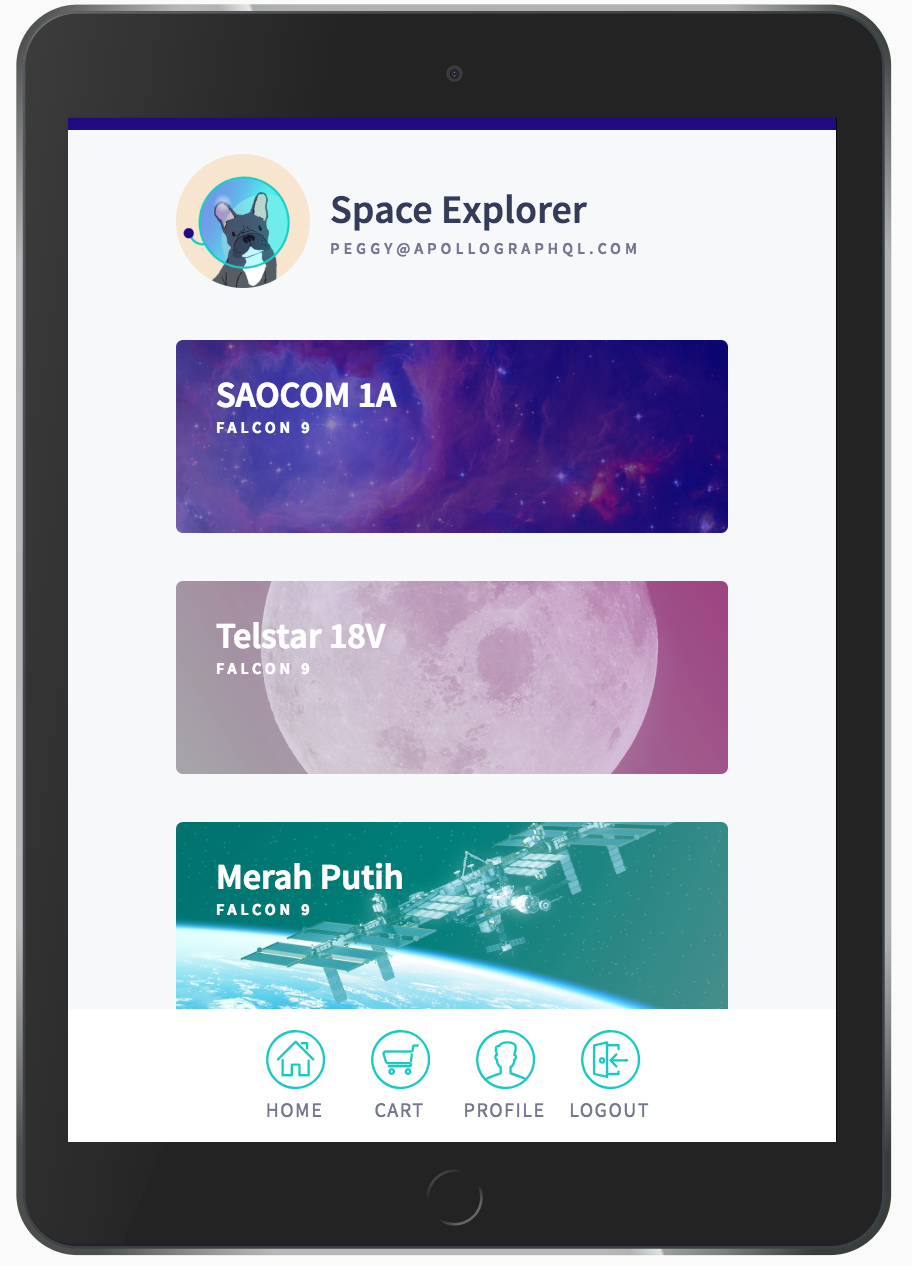
このアプリケーションには以下の画面があります。
The app includes the following views:
- ログインページ
- 予定される打ち上げ日程のリスト
- 各打ち上げの詳細
- ユーザープロフィールページ
- チケット購入カート
これらの画面のために GraphQL の data graph は二つのデータソースにつながっています。一つは REST API で、もう一つは SQLite のデータベースです。(この二つの技術に詳しくなくてもチュートリアルを進める上では問題ありませんので心配しないでください。)
To populate these views, our app's data graph will connect to two data sources: a REST API and a SQLite database. (Don't worry, you don't need to be familiar with either of those technologies to complete the tutorial.)
すでに言及したことですが、今回作るアプリケーションはなるべく実際の例に近づくようにしましたので、このアプリケーションには認証やページネーションや状態管理といった一般的によくある便利機能が組み込まれています。
As mentioned, we want this example to resemble a real-world Apollo app, so we'll also add common useful features like authentication, pagination, and state management.
Prerequisites
このチュートリアルはみなさんが JavaScript の ES6 バージョンと React に慣れていることを前提としています。React の復習が必要な場合は 公式 tutorial を読むことをお勧めします。
This tutorial assumes that you're familiar with both JavaScript/ES6 and React. If you need to brush up on React, we recommend going through the official tutorial.
Apollo 環境を使う場合に、フロントは必ずしも React を使う必要はありませんが、React は Apollo が特にサポートしているライブラリではあります。もちろん Angular や Vue を用いることもできますし、このチュートリアルの概念はそれらのライブラリを使う場合にも適応することができます。
Building your frontend with React is not a requirement for using the Apollo platform, but it is the primary view layer supported by Apollo. If you use another view layer (such as Angular or Vue), you can still apply this tutorial's concepts to it.
System requirements
始める前に以下のリストがインストールされていることを確認しましょう。
Before we begin, make sure you have the following installed:
また必須ではありませんがエディターには VS Code を使用することを推奨します。そうすることで Apollo の拡張機能を使うことができます。(訳注: WebStorm もいいよ!拡張機能もあるよ!)
Although it isn't required, we also recommend using VS Code as your editor so you can use Apollo's helpful VS Code extension.
Clone the example app
さあ面白くなっていきますよ!お望みの開発ディレクトリに移動したら、このリポジトリ をクローンしましょう。
Now the fun begins! From your preferred development directory, clone this repository:
git clone https://github.com/apollographql/fullstack-tutorial.gitこのリポジトリは一番上の階層に start と final というディレクトリがあります。このチューチルアルの作業は start ディレクトリの中に加えていきます。そうすると全ての作業が終わった時には final ディレクトリの中と一致することになるというわけです。
The repository contains two top-level directories:
startandfinal. During the tutorial you'll edit the files instart, and at the end they'll match the completed app infinal.
start と final ディレクトリの下にはそれぞれ server と client というディレクトリがあります。まずは server ディレクトリから作業を始めていきます。もし graph API の構築についてよく知っている場合にはこのセクションは飛ばして client の領域に進みたいと思うでしょう。その場合にはこのチュートリアルの後半 に移動してください
Each top-level directory contains two directories of its own:
serverandclient. We'll be working in theserverdirectory first. If you're already comfortable building a graph API and you want to skip to theclientportion, navigate to the second half of the tutorial.
Need help?
新しい技術を習得するというのは時にその大変さに押しつぶされそうになるものです。ハマるのもよくあることです。その場合には Apollo Spectrum community に入って関連チャンネルで助けを求める投稿をしてみましょう。きっと親切な開発者が手を貸してくれるはずです。(訳注: uncle-javascript.com でも GraphQL を含むコンテンポラリーJavaScript に関する開発情報を提供しています。コンタクトしてください。)
Learning a new technology can be overwhelming sometimes, and it's common to get stuck! If that happens, we recommend joining the Apollo Spectrum community and posting in the relevant channel (either
#apollo-serveror#apollo-client) for assistance from friendly fellow developers.
もしこのチュートリアルにわかりにくい部分やエラーが含まれている場合には、フィードバックをしてください。Edit on GitHub と書かれたリンクがこのページの右側にあります。これをクリックしてプルリクエストを出してください。おしくは リポジトリでイシューを作成 していただいてもいいです。(訳注: この翻訳はこのリポジトリでおこなっていますので、修正リクエストや翻訳の追加をおこなうこともできます。)
If anything in the tutorial seems confusing or contains an error, we'd love your feedback! Click the Edit on GitHub link on the right side of the page to open a new pull request, or open an issue on the repository.